This comprehensive guide will walk you through the process of setting up a Virtual Private Server (VPS) from scratch, covering initial access, user management, security measures, and software installation.
Local Creation of an SSH Key Pair
On your local machine, open a terminal and create a new SSH key pair:
ssh-keygen -t rsa -b 4096 -C "vps_setup@example.com" -f ~/.ssh/id_rsa_vps_setupAdd a strong passphrase when prompted. This command sets the file location to ~/.ssh/id_rsa_vps_setup.
Display your public key on terminal and take note of it:
cat ~/.ssh/id_rsa_vps_setup.pubRemote creation of a VPS with Root Access
The exact setup may vary depending on your VPS provider, but generally:
- Log in to your VPS provider’s control panel, and choose to create a VPS
- Select Ubuntu as the Operating System, and choose your specifications (CPU, RAM, storage)
- In the SSH key section, paste the contents of your public key, in our case:
~/.ssh/id_rsa_vps_setup.pub. - Give a memorable name to your VPS, e.g. PhantomVPS
- Complete the creation and note down the VPS IP address provided
In this example, I use DigitalOcean to create a VPS with Ubuntu 24.10

Local modification of the Hosts File
To simplify SSH access, update your local ~/.ssh/config file:
Host phantom-root
  HostName 157.245.213.137
  User root
  IdentityFile ~/.ssh/id_rsa_vps_setup
Now you can easily connect to your VPS using the alias phantom-root.
ssh phantom-root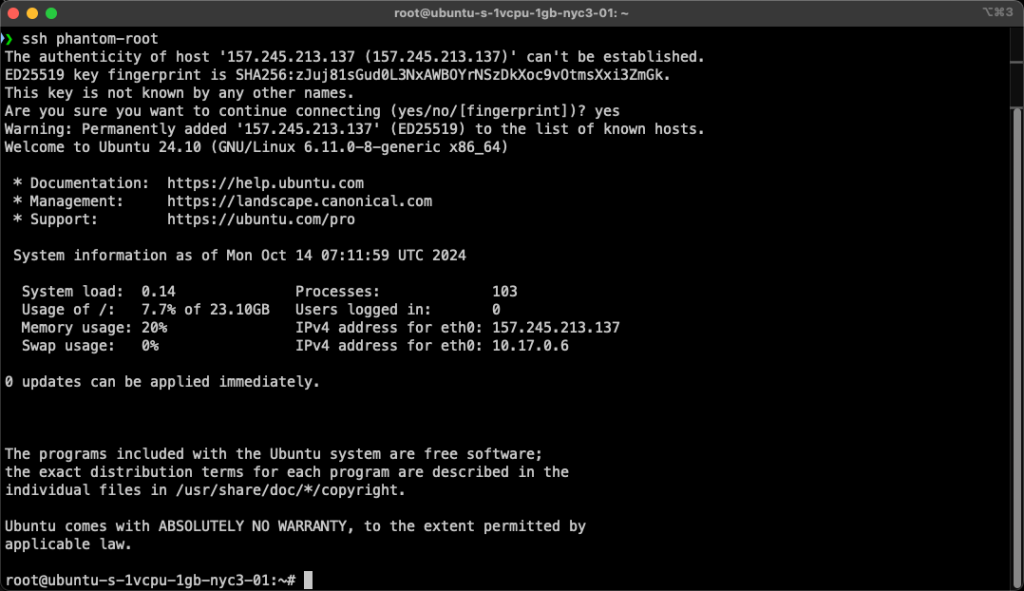
Alternatively, you can use the default connection method. Note the ~/.ssh/config file is still used to specify which public key you use for a given server.
ssh root@<your.vps.address>For daily operations, avoid using the root user. Files created by root are owned by root, restricting access to others.
Create sudo User for DevOps
To avoid using root, let’s create a sudo-enabled user for DevOps:
Make sure you’re logged in as root, then create the user:
adduser devops
usermod -aG sudo devops
passwd -e devops #force change password at first login
Enable Public Key Authentication for the User
To enable public key authentication for the new user, you can reuse the authorized_keys file from the root user or set up a new public key.
This method is often used in small teams and test environments. From the VPS as root:
mkdir -p /home/devops/.ssh
cp /root/.ssh/authorized_keys /home/devops/.ssh/
sudo chown -R devops:devops /home/devops/.ssh
sudo chmod 700 /home/devops/.ssh
sudo chmod 600 /home/devops/.ssh/authorized_keys
Here, we login as root, copy the root’s authorized_keys to the new user, and set proper permissions on user ~/.ssh folder and contents.
Method 2: Adding a new public key with ssh-copy-id
If you have the public key for the new user (e.g., id_rsa_devops_vps.pub), you can copy it to the server. From your local terminal:
ssh-copy-id -i /path/to/user/publickey.pub "devops@your_vps_ip -o 'ProxyCommand ssh root@your_vps_ip -W %h:%p'"This command uses root access to connect and forward the connection to the devops user:
-i /path/to/user/publickey.pub: Specifies the public key file to copy- The quoted part creates a ProxyCommand that uses your root access to connect, then forwards the connection to the devops user
- You’ll be prompted for the root password of your VPS.
- After entering the password, the public key will be copied to the
/home/devops/.ssh/authorized_keysfile.
Test devops user
Log out, then test access with the new user:
Update your ~/.ssh/config file by adding :
Host phantom-devops
    HostName <your.vps.ip.address>
    User devops
    IdentityFile ~/.ssh/id_rsa_vps_setup
Then connect using:
ssh phantom-devops
Here you see at first login you need to change password. Do so, and then re-login, so you can start operations.
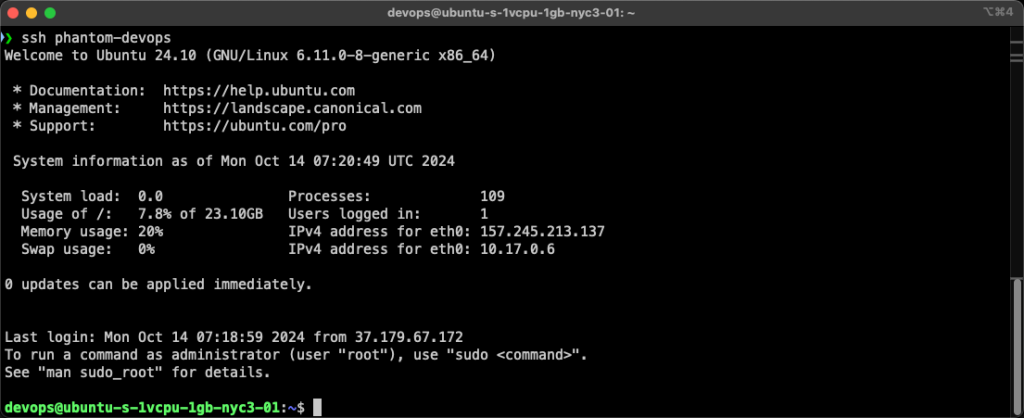
If successful, avoid using the root account and switch to devops for all operations.
VSCode remote SSH setup
If you’re using Visual Studio Code for server management, follow these steps to set up Remote SSH:
- Install the “Remote – SSH” extension from microsoft (link)
- Press F1 (or Cmd+Shift+P), type “Remote-SSH: Connect to Host”, and select it
- Enter devops@<your.vps.address> and press enter
- Select the appropriate SSH configuration file if prompted
- VSCode will open in a new window connected to your VPS
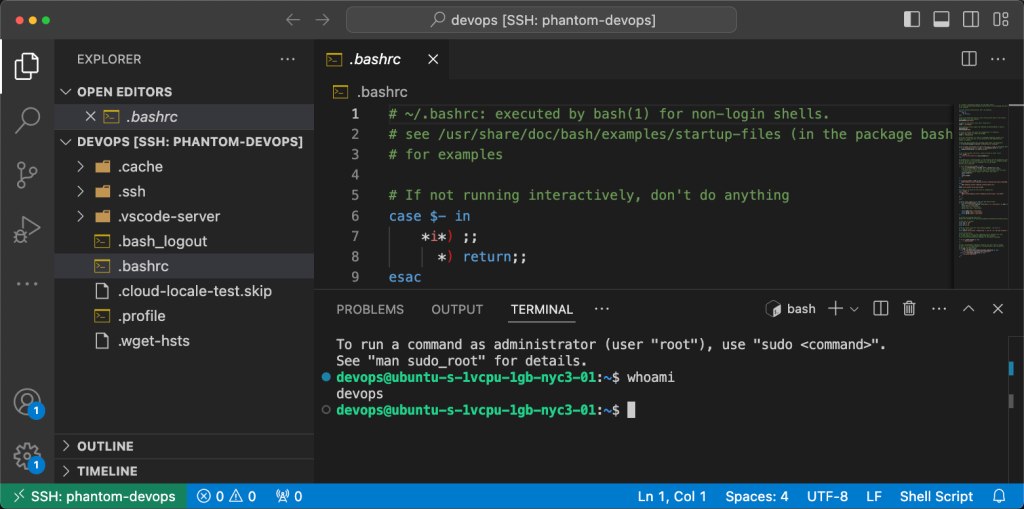
You can now explore the filesystem and work on your VPS directly from VSCode
Visual Guide
See the screnshoots below for a quick guide to help you with the process.
Select Remote-SSH

Select Host

Open Terminal, then select Open Folder, and select the user’s home folder
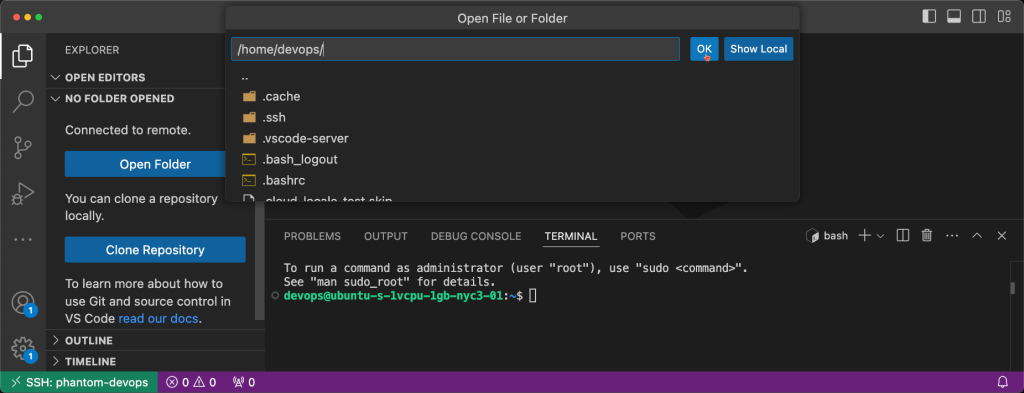
And then you can comfortably operate on your VPS and edit files on your filesystem in a nicely integrated environment 😉
Secure your VPS
Connect to the VPS as the devops user, then apply the following security measures:
Secure SSH
Edit the SSH config file:
sudo nano /etc/ssh/sshd_configUpdate the following lines to deny root access and password authentication:
PermitRootLogin no
PasswordAuthentication no
Tips: use Ctrl+W to find specific text in nano; Ctrl+X, followed by Y, to save and exit.
Restart SSH for the changes to take effect:
sudo systemctl restart sshAfter restart, ssh open a new terminal, and verify that you cannot login as root and that you can still login as devops, as in the image below.

Install UFW firewall
UFW (Uncomplicated Firefall) simplifies firewall management on Linux. Start by installing it:
sudo apt update && sudo apt upgrade -y
sudo apt install ufw
sudo ufw allow OpenSSH
sudo ufw enable
Allow or deny specific services:
sudo ufw allow ssh
sudo ufw allow 80 # Allow http
sudo ufw allow 443 # Allow https
sudo ufw deny 21 # Deny FTP
Check firewall status:
sudo ufw status verbose
Install and configure fail2ban
Fail2Ban protects servers from brute-force attacks by temporarily/permanently banning IP addresses. Install it using:
sudo apt install fail2banConfigure Fail2Ban settings as needed, then restart the service:
sudo systemctl restart fail2banWhen running, you can check the status and the running jails with the commands below:
# system status
sudo systemctl status fail2ban

# check jails
sudo fail2ban-client status
Install and Configure Software
Node.js (with NVM)
Install NVM (Node Version Manager) to manage multiple Node.js versions:
curl -o- https://raw.githubusercontent.com/nvm-sh/nvm/v0.39.1/install.sh | bash
source ~/.bashrc
nvm install node
To change Node.js versions:
nvm install <version>
nvm use <version>
See below an example of version change.

Python
Install python
sudo apt install python3 python3-pipTo manage Python versions, consider using pyenv.

Java
Install Java
sudo apt install default-jdkTo manage Java versions, consider using sdkman.

Docker
Docker is a platform for develop, ship and run applications in a container. Here’s how to install it on your VPS:
Update the package index and install prerequisites
sudo apt update
sudo apt install apt-transport-https ca-certificates curl software-properties-common
Add Docker’s official GPG key
curl -fsSL https://download.docker.com/linux/ubuntu/gpg | sudo gpg --dearmor -o /usr/share/keyrings/docker-archive-keyring.gpgSet up the stable docker repository
echo "deb [arch=$(dpkg --print-architecture) signed-by=/usr/share/keyrings/docker-archive-keyring.gpg] https://download.docker.com/linux/ubuntu $(lsb_release -cs) stable" | sudo tee /etc/apt/sources.list.d/docker.list > /dev/nullUpdate the package index again and install docker
sudo apt update
sudo apt install docker-ce docker-ce-cli containerd.io
Verify that Docker is installed correctly:
sudo docker run hello-world
(Optional) Add your user to the docker group to run Docker commands without sudo:
sudo usermod -aG docker ${USER}Note: You’ll need to log out and back in for this change to take effect.
(Options) Configure Docker to start on boot:
sudo systemctl enable dockerAdd Helpful DevOps Scripts
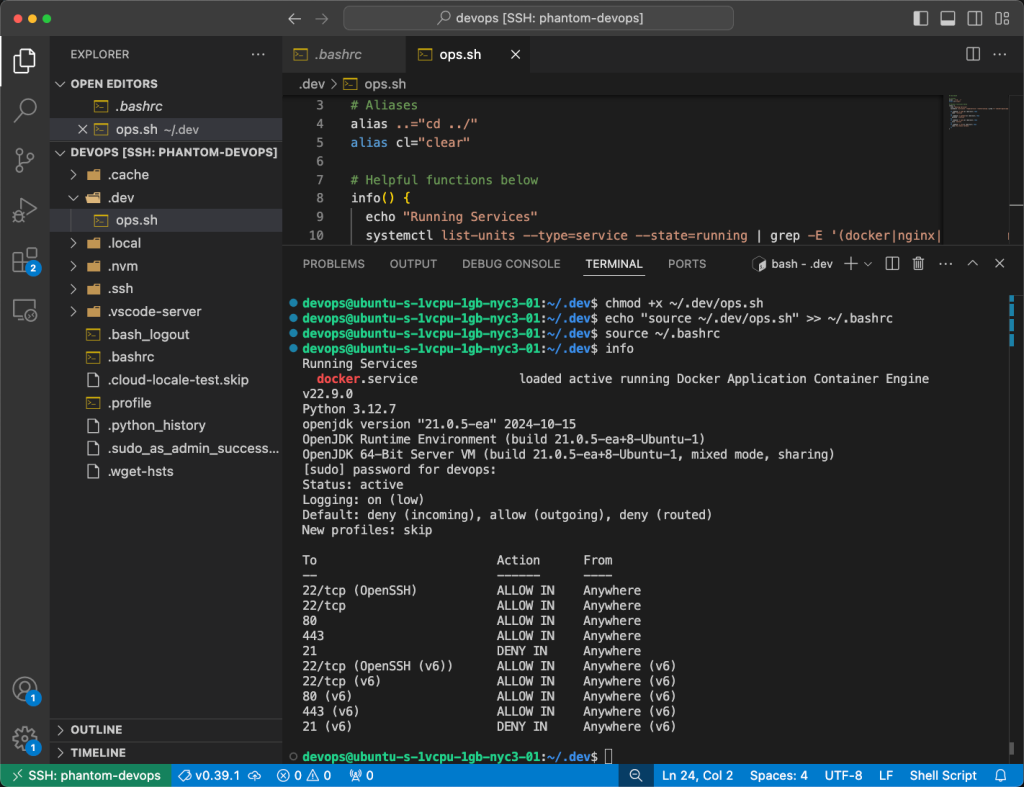
I typically have some scripts for helping me in everyday operations. To do so, I create a .dev/ops.sh file, which I source with bashrc.
Create .dev/ops.sh script fileL
mkdir -p ~/.dev
nano ~/.dev/ops.sh
Add the following content
#!/bin/bash

# Aliases
alias ..="cd ../"
alias cl="clear"

# Helpful functions below
info() {
  echo "Running Services"
  systemctl list-units --type=service --state=running | grep -E '(docker|nginx|apache2|mysql|mariadb|postgresql|mongodb|redis)'

  if command -v node &> /dev/null; then
    node --version
  fi
  if command -v python3 &> /dev/null; then
    python3 --version
  fi
  if command -v java &> /dev/null; then
    java -version
  fi
  if command -v ufw &> /dev/null; then
    sudo ufw status verbose
  fi
}
Make the script executable:
chmod +x ~/.dev/ops.shEdit your .bashrc to source this script
echo "source ~/.dev/ops.sh" >> ~/.bashrcApply changes
source ~/.bashrcNow you can use the defined aliases and functions to operate on your VPS.

0 Comments