A guide to setup and benchmark Local LLMs (Large Language Models) for analyzing and reverse engineering complex software projects. In the walkthrough, I setup a system for analyzing Python on top of a macOs system. The contents can be easily generalized to analyze different languages (e.g. Java or Javascript) on top of different os’es (e.g. Linux and Windows).
Source code available here: https://github.com/psuzzi/ai.reveng.
Please, note: This is a DRAFT article, which I need to be public for sharing and getting feedback
Introduction
In recent years, LLMs (Large Language Models) have become powerful tools for programmers, aiding in tasks like code analysis and reverse engineering. While cloud based services offer convenience, they come with significant privacy and data security concerns. This document outlines how to setup and benchmark local LLMs for code analysis, offering a solution that ensures privacy by running models locally on your own systems.
Selecting a Local AI Solution
Instead of using cloud services, I choose Ollama paired with CodeLlama as my local AI solution. After comparing it with LM Studio and GPT4All, Ollama proved superior in ease of use, integration capabilities, community support, and code analysis features. The comparison table below shows the details.
| Aspect | Ollama | LM Studio | GPT4All |
| Installation | Single-command, Docker-like | Desktop installer | Multiple components |
| Interface | CLI + API | GUI + chat | GUI + API |
| Model management | Simple pull commands, easy switching | Visual model browser, manual download | Limited selection, manual management |
| Code Analysis Features | Strong (e.g. using CodeLlama) | Basic | Basic |
| Integration Ease | High (REST API) | Medium (Wrappers) | Medium (Python APIs) |
| Community Support | Very active, growing | Active | Moderate |
| Best Use Case | Automated workflows, development | Interactive exploration | General text analysis |
The key advantage of Ollama is its simplicity combined with powerful features specifically designed for code analysis. The REST API allows seamless integration with existing development tools, creating efficient workflows for large codebase analysis.
Setup Ollama and run CodeLlama
Ollama provides a straightforward installation process on macOS using Homebrew. Here is how to get started:
brew install ollamaNote: Execute ollama help, to learn the basic commands, e.g.: ollama pull, run, list, rm [model], create [model], show [model] .
Start the Ollama service. You have two options:
# to start now without background service
ollama serve

# to start now and restart at login
brew services start ollamaOnce Ollama is running, install Codellama:
# install
ollama pull codellamaNote: You can check your models with ollama list, and remove them with ollama rm [model].
Now you have a Local LLM ready to use. Test the model with a simple deterministic task.
# Test model with a simple request
ollama run codellama "Python program to generate fibonacci numbers"Below you can see the output for our input:
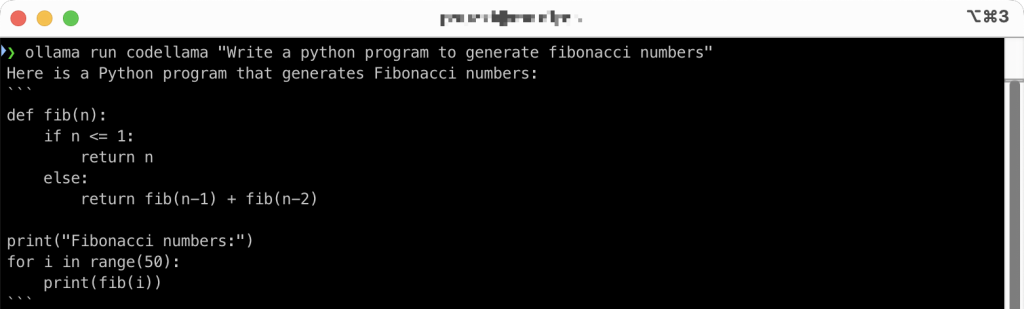
Note: The first time a model is used, it is slower than subsequent uses because the model must be loaded into memory. Model loading typically takes 10-30 seconds depending on your hardware.
Troubleshooting Tips:
- If Ollama fails to start, check if port 11434 is already in use
- For “out of memory” errors, try a smaller model or increase swap space
- Ensure you have at least 10GB of free disk space for model storage
This section demonstrated how to setup and use a Local LLM within a few minutes. In the next sections, we select specific CodeLlama models based on system considerations, and we execute a benchmark comparing the different models.
Select Models based on System Requirements
Language models (LLMs) can run in either full precision (FP32) or quantized modes. Quantization compresses 32-bit floating point numbers into 4-bit or 8-bit formats, reducing model size by up to 87%. For instance, a 7B parameter model can be compressed from 28GB (FP32) to 4GB using 4-bit quantization (Q4).
Model Variants: CodeLlama provides three quantization options with different tradeoffs:
- K: Standard quantization with maximum accuracy
- K_M: Balanced quantization offering moderate compression with good performance
- K_S: High compression with some accuracy tradeoff
System requirements by Model Size
| Model Size | RAM | Storage | VRAM | Best For |
| 7B | 8GB | 4GB | 6GB | Simple code completion, basic analysis |
| 13B | 16GB | 7GB | 8GB | Complex code understanding, better reasoning |
| 34B | 32GB | 18GB | 16GB | Deep code analysis, advanced reasoning. |
The tradeoff is clear: larger models provide better understanding and reasoning capabilities but require significantly more resources. For most development tasks, the 13B model offers a good balance between performance and resource requirements.
Implementation Example
This example demonstrates running CodeLlama on an Apple Silicon M1 with 32GB RAM and 500GB storage. The system supports local LLM inference well.
To balance performance and resource usage, we’ll test the K_M (medium quantization) variants of the 7B, 13B, and 34B models:
# Smallest but still capable
ollama pull codellama:7b-code-q4_K_M

# Better performance
ollama pull codellama:13b-code-q4_K_M

# Best performance
ollama pull codellama:34b-code-q4_K_MNote: you can check the available models in https://ollama.com/library/codellama/tags.
Benchmarking Models
Common pitfalls in LLM benchmarking
Let’s examine a naive benchmark approach to understand what not to do:
time ollama run codellama:7b-code-q4_K_M "Write a simple function"

# Output: [tokens generated with varying latency]
# Result: 0.05s user 0.05s system 0% cpu 32.273 totalThis approach has several limitations:
- Combines timing model loading and inference time
- Uses a non deterministic prompt that procude varying outputs
- Lacks measurement of crucial metrick like time-to-first-token
- Doesn’t account for run-to-run variance
- GPU utilization isn’t properly measured
Best Practices for LLM Benchmarking
Prompt Design: Deterministic Prompts with Testable Output
- Use prompts that consistently produce the same outputs given the same inputs
- Specify structured output formats (e.g. specific JSON format)
- Include validation cases with expected outputs for testing
Sample Deterministic Prompt
Here is an example of a prompt which can lead to deterministic and measurable results.
Generate a Python function to calculate the factorial of a number.
Format the output as a single Python function named 'factorial' that:
- Takes a single integer parameter 'n'
- Returns the factorial value (n!)
- Include a docstring explaining the function
- Handle the case where n=0 returns 1
- Only include the function, no examples or explanations outside the function.Measurement Methodology
- Separate cold start (first run) and warm start measurements
- Track key metrics:
- Time to first token
- Total generation time
- Token throughput [tokens/sec]
- Peak memory usage
For benchmarking models, having a stable prompt is crucial. For instance, the prompt “Write a simple function” would bring non-deterministic results, as the results may vary widely.
For benchmarking different language models, follow these key principles:
- Deterministic Tasks: Choose tasks which have clear, unambiguous expected outputs
- Structured Output Requirements: Include explicit format requirements to make outputs comparable
- Context-Independent Prompts: Avoid prompts which can produce different results based on time or context
- Complex Bounded Tasks: For testing more comprehensive capabilities
- Standardized Test Cases: Include specific test cases in the prompt
Once a set of stable prompts is defined, also consider:
- Run each prompt multiple times to account for variance
- Measure both cold start and warm start times
- Measure: Time to first token, total generation time, token generation rate, memory usage, output consistency across runs
Below you can see a generic Python script we could use to benchmark the model
import time
import statistics

def benchmark_prompt(model, prompt, runs=10):
    times = []
    for i in range(runs):
        start = time.time()
        response = run_model(model, prompt)
        end = time.time()
        times.append(end - start)

    return {
        'min': min(times),
        'max': max(times),
        'mean': statistics.mean(times),
        'median': statistics.median(times),
        'std_dev': statistics.stdev(times)
}My actual benchmark script is a bit more complex and interfaces directly with ollama running codellama. Below you can see a is a Python script to properly benchmark the models:
Below is a Python script to properly benchmark the models:
import time
import statistics
import subprocess
import json
import psutil
import re

def run_model(model, prompt):
    """Run the model with the given prompt and return the response."""
    cmd = ["ollama", "run", model, prompt, "--format", "json"]
    process = subprocess.Popen(cmd, stdout=subprocess.PIPE, stderr=subprocess.PIPE)
    output, error = process.communicate()

    # Parse the JSON response
    response = json.loads(output.decode('utf-8'))
    return response

def benchmark_prompt(model, prompt, runs=5):
    """Benchmark a model with a specific prompt."""
    results = {
        'cold_start': {},
        'warm_start': {},
        'memory_usage': [],
        'token_metrics': []
    }

    # Cold start (first run)
    # First ensure model is unloaded
    subprocess.run(["ollama", "rm", model], stdout=subprocess.PIPE, stderr=subprocess.PIPE)
    subprocess.run(["ollama", "pull", model], stdout=subprocess.PIPE)

    # Measure memory before
    mem_before = psutil.virtual_memory().used

    # Run the cold start test
    start_time = time.time()
    response = run_model(model, prompt)
    end_time = time.time()

    # Measure memory after
    mem_after = psutil.virtual_memory().used
    mem_used = mem_after - mem_before

    results['cold_start'] = {
        'total_time': end_time - start_time,
        'total_tokens': len(response['response'].split()),
        'tokens_per_sec': len(response['response'].split()) / (end_time - start_time)
    }
    results['memory_usage'].append(mem_used)

    # Warm start (subsequent runs)
    times = []
    token_counts = []
    tokens_per_sec = []

    for _ in range(runs):
        start_time = time.time()
        response = run_model(model, prompt)
        end_time = time.time()

        elapsed = end_time - start_time
        token_count = len(response['response'].split())

        times.append(elapsed)
        token_counts.append(token_count)
        tokens_per_sec.append(token_count / elapsed)

        mem_after = psutil.virtual_memory().used
        results['memory_usage'].append(mem_after - mem_before)

    # Calculate warm start statistics
    results['warm_start'] = {
        'min_time': min(times),
        'max_time': max(times),
        'mean_time': statistics.mean(times),
        'median_time': statistics.median(times),
        'std_dev_time': statistics.stdev(times) if len(times) > 1 else 0,
        'avg_tokens': statistics.mean(token_counts),
        'avg_tokens_per_sec': statistics.mean(tokens_per_sec)
    }

    return results

# Example usage
models = [
    "codellama:7b-code-q4_K_M",
    "codellama:13b-code-q4_K_M",
    "codellama:34b-code-q4_K_M"
]

test_prompts = [
    "Generate a Python function to calculate the factorial of a number. Format the output as a single Python function named 'factorial'...",
    "Write a function to detect if a string is a palindrome in JavaScript...",
    "Create a C++ class for a simple binary tree with methods for insertion, deletion, and traversal..."
]

# Run benchmarks
results = {}
for model in models:
    results[model] = {}
    for prompt in test_prompts:
        results[model][prompt[:20] + "..."] = benchmark_prompt(model, prompt)

# Output results as JSON
print(json.dumps(results, indent=2)).
Download models
To download and prepare models for your code analysis tasks, follow these steps:
Identify the Model Size: Based on your system capabilities (from the table above), select an appropriate model size.
Choose Quantization Level: Based on your accuracy vs. resource tradeoff needs:
- Use K for maximum accuracy (larger size)
- Use K_M for balanced performance/size
- Use K_S for minimal resource usage (lower accuracy)
Download Selected Models, see snippet below.
# For comprehensive code analysis (if your system can handle it)
ollama pull codellama:34b-code-q4_K_M

# For a balanced approach
ollama pull codellama:13b-code-q4_K_M

# For resource-constrained systems
ollama pull codellama:7b-code-q4_K_SVerify downloads
# List all installed models with sizes
ollama listTag Models for specific task, optional
# Create a copy of the model with task-specific settings
ollama create python-analyzer -f ModelfileExample Modelfile content
FROM codellama:13b-code-q4_K_M
PARAMETER temperature 0.1
PARAMETER top_p 0.8
SYSTEM You are a Python code analyzer specialized in reverse engineering complex codebases.This creates a specialized model variant optimized for Python code analysis with low temperature (more deterministic outputs).
Setup tools to interface with codebase
To maximize the effectiveness of local LLMs for code analysis, integrate them with tools that can process your codebase:
Set up a code exploration system using:
# Install ripgrep for fast code search
brew install ripgrep

# Create a simple script to extract functions/classes
cat > extract_code.sh << 'EOF'
#!/bin/bash
# Usage: ./extract_code.sh <function_name> <directory>
rg -t py --context 20 "def $1|class $1" $2
EOF
chmod +x extract_code.shLLM Integration Script
Create a Python script to send code to your local LLM
import sys
import subprocess
import json

def analyze_code(code_snippet, question):
    """Send code to Ollama for analysis."""
    prompt = f"""
    Analyze this code:
    ```python
    {code_snippet}
    ```

    {question}

    Provide a concise explanation focusing specifically on the question.
    """

    cmd = ["ollama", "run", "codellama:13b-code-q4_K_M", prompt]
    result = subprocess.run(cmd, capture_output=True, text=True)
    return result.stdout

if __name__ == "__main__":
    if len(sys.argv) < 3:
        print("Usage: python analyze.py <code_file> <question>")
        sys.exit(1)

    code_file = sys.argv[1]
    question = sys.argv[2]

    with open(code_file, 'r') as f:
        code = f.read()

    analysis = analyze_code(code, question)
print(analysis)VSCode Integration
For VSCode users, create a simple extension or tasks:
Add to your .vscode/tasks.json:
{
  "version": "2.0.0",
  "tasks": [
    {
      "label": "Analyze Current File",
      "type": "shell",
      "command": "python ${workspaceFolder}/analyze.py ${file} 'Explain what this code does'",
      "problemMatcher": []
    }
  ]
}Batch Processing for Large Codebases
For analyzing entire repositories:
import os
import subprocess
import json

def analyze_repo(repo_path, output_dir):
    """Generate a report on an entire codebase."""
    # Create output directory
    os.makedirs(output_dir, exist_ok=True)

    # Find all Python files
    python_files = []
    for root, _, files in os.walk(repo_path):
        for file in files:
            if file.endswith('.py'):
                python_files.append(os.path.join(root, file))

    # Analyze each file
    for py_file in python_files:
        rel_path = os.path.relpath(py_file, repo_path)
        output_file = os.path.join(output_dir, rel_path + '.analysis.md')
        os.makedirs(os.path.dirname(output_file), exist_ok=True)

        with open(py_file, 'r') as f:
            code = f.read()

        prompt = f"""
        Analyze this Python file:
        ```python
        {code}
        ```

        Provide a comprehensive analysis including:
        1. Overall purpose of the file
        2. Main classes and functions
        3. Dependencies and imports
        4. Potential issues or optimizations

        Format output as Markdown.
        """

        cmd = ["ollama", "run", "codellama:13b-code-q4_K_M", prompt]
        result = subprocess.run(cmd, capture_output=True, text=True)

        with open(output_file, 'w') as f:
            f.write(result.stdout)

        print(f"Analyzed: {rel_path}")

# Example usage
# analyze_repo('/path/to/repo', '/path/to/output')Appendix
Architecture-Specific Performance
Here is a comparison of two mainstream different architectures:
Apple Silicon (ARM)
- Unified memory architecture improves memory bandwidth
- Metal API optimizations for ML workloads
- Native support for quantized models via Core ML
- Efficient power consumption
- Performances scales with chip variant (M1, M2, M3, M4)
- Memory limitations based on integrated system design
x86 + NVIDIS GPU (CISC)
- Dedicated VRAM separate from system RAM
- CUDA acceleration for optimal performance
- Higher power consumption but potentially faster inference
- Flexible memory configuration
- Benefits from PCIe bandwidth for data transfer
- Multiple GPU configurations possible
All variants perform optimally with their respective hardware accelerations (Metal for Apple Silicon, CUDA for NVIDIA GPUs) and SSD storage. While CPU-only operation is possible on both architectures, hardware acceleration significantly improves inference speed.
This guide provides a comprehensive overview of setting up local LLMs for code analysis. By running these models locally, you maintain complete privacy over your code while still benefiting from AI-assisted code understanding. The techniques described here can be adapted to any programming language and development environment.
For the latest updates and additional tools, check the GitHub repository: https://github.com/psuzzi/ai.reveng
0 Comments